
Eselram help centre
Setup & configuration guides.
Everything you need to install Eselram, configure your business and build the right booking and treatment journeys for your services.
Getting started
Install and configure Eselram.
Follow the complete setup journey from your licence email to your first end-to-end customer booking. Open each step as you work through it.
Before you start
Have these ready so you can complete setup without stopping halfway through:
- Your Eselram licence email
- A Cloudflare account or login
- The Gmail/Google account you want to send from
- Your Stripe account if taking online payments
- Your business logo and contact details
- Your opening hours
- Your services, prices and durations
- Your Google review link, if used
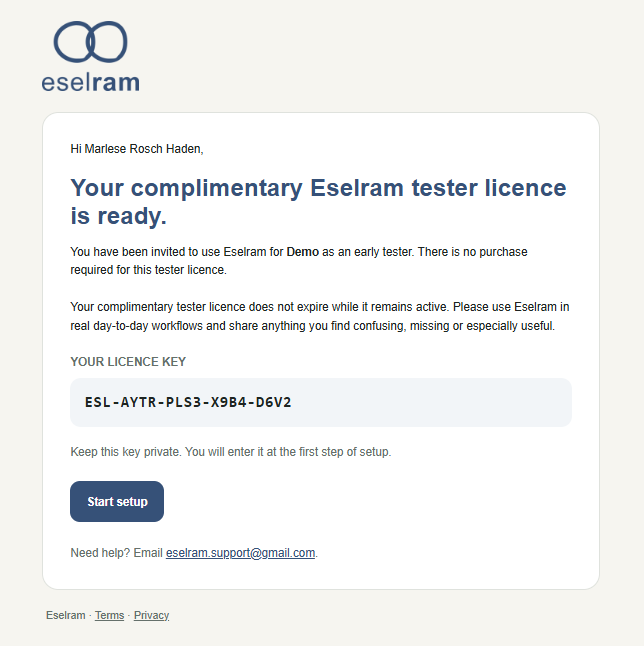
1. Find your Eselram licence email
Your Eselram licence email contains the licence code issued to your business and the link that starts installation. Keep the email safe because the licence identifies your installation.
Select Start setup in the email when you're ready.
2. Enter and validate your licence
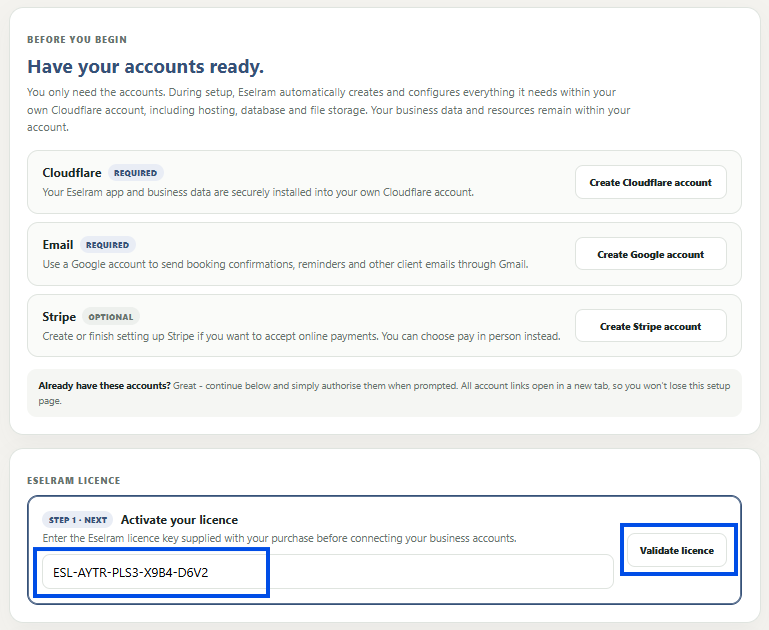
Copy the licence code exactly as it appears in your email, paste it into the installer and select Validate licence. Eselram checks the licence before the account-connection steps become available.
3. Connect Cloudflare, email and payments
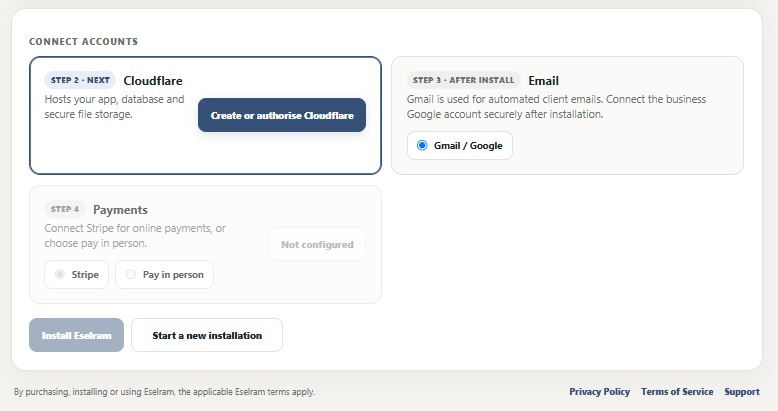
The installer groups the external connections your Eselram installation can use. Start with Cloudflare, then connect email, and configure payments if required.
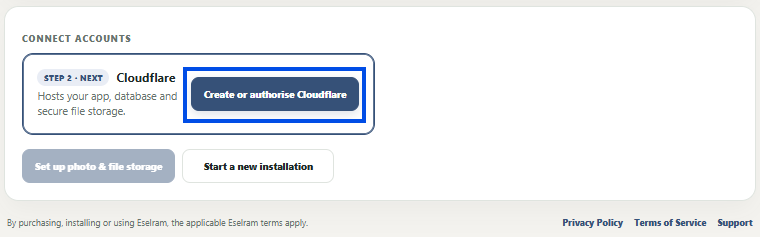
Cloudflare
Select Create or authorise Cloudflare. If you already have a Cloudflare account, sign in and authorise Eselram - you do not need to create another account. Eselram uses the authorised account to create the infrastructure required for your installation.
For Gmail, connect the Google account you want customers to recognise as your business sender and approve the requested authorisation. After installation, send yourself a test email before going live.
Payments
If you take online payments, connect the Stripe account belonging to your business and complete Stripe's onboarding. Stripe may ask for your legal/business details, website, payout bank account, statement descriptor and customer-support details. These should be your business details. You can still configure individual Eselram services to use other payment rules, including payment at the appointment.
4. Complete the guided business setup
Once the installation is ready, Eselram guides you through the core business configuration. Work through each screen and save before continuing.
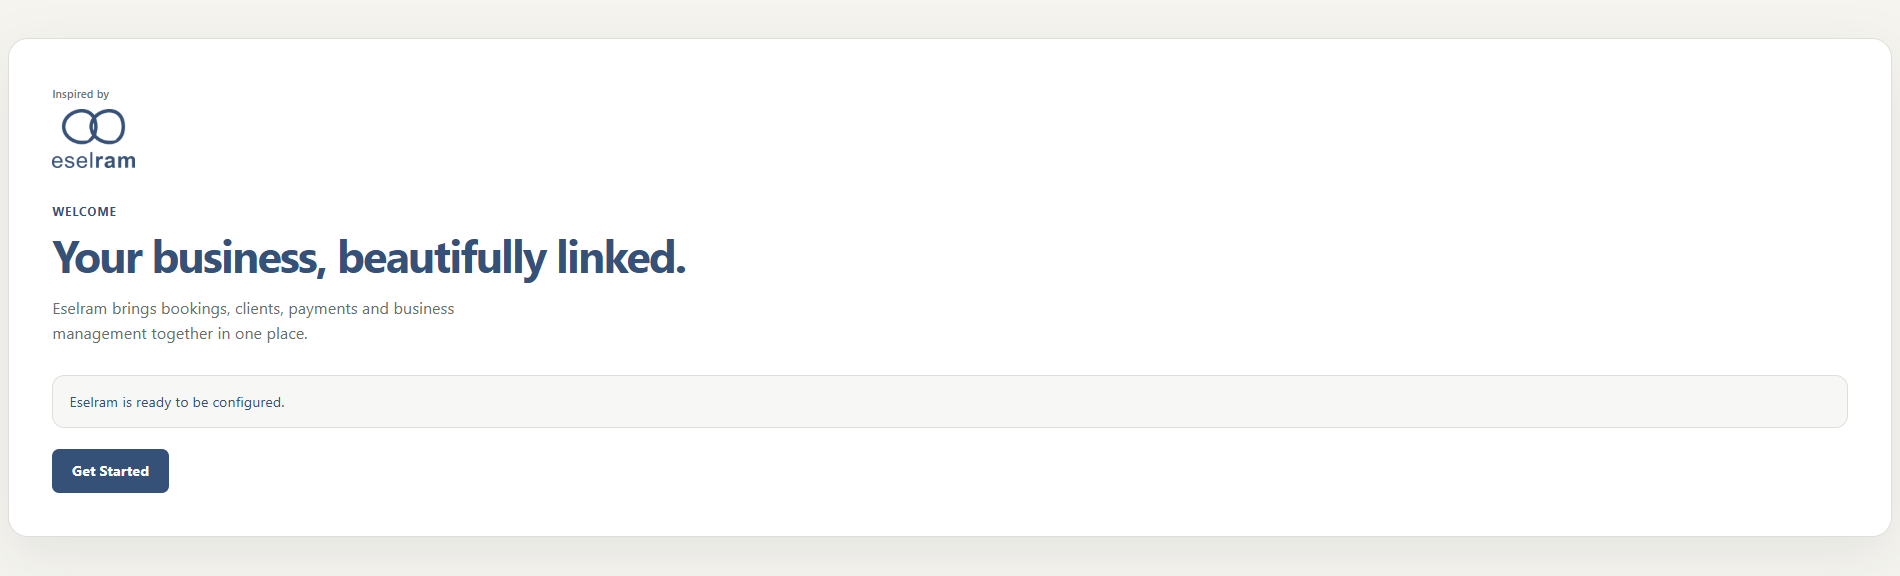
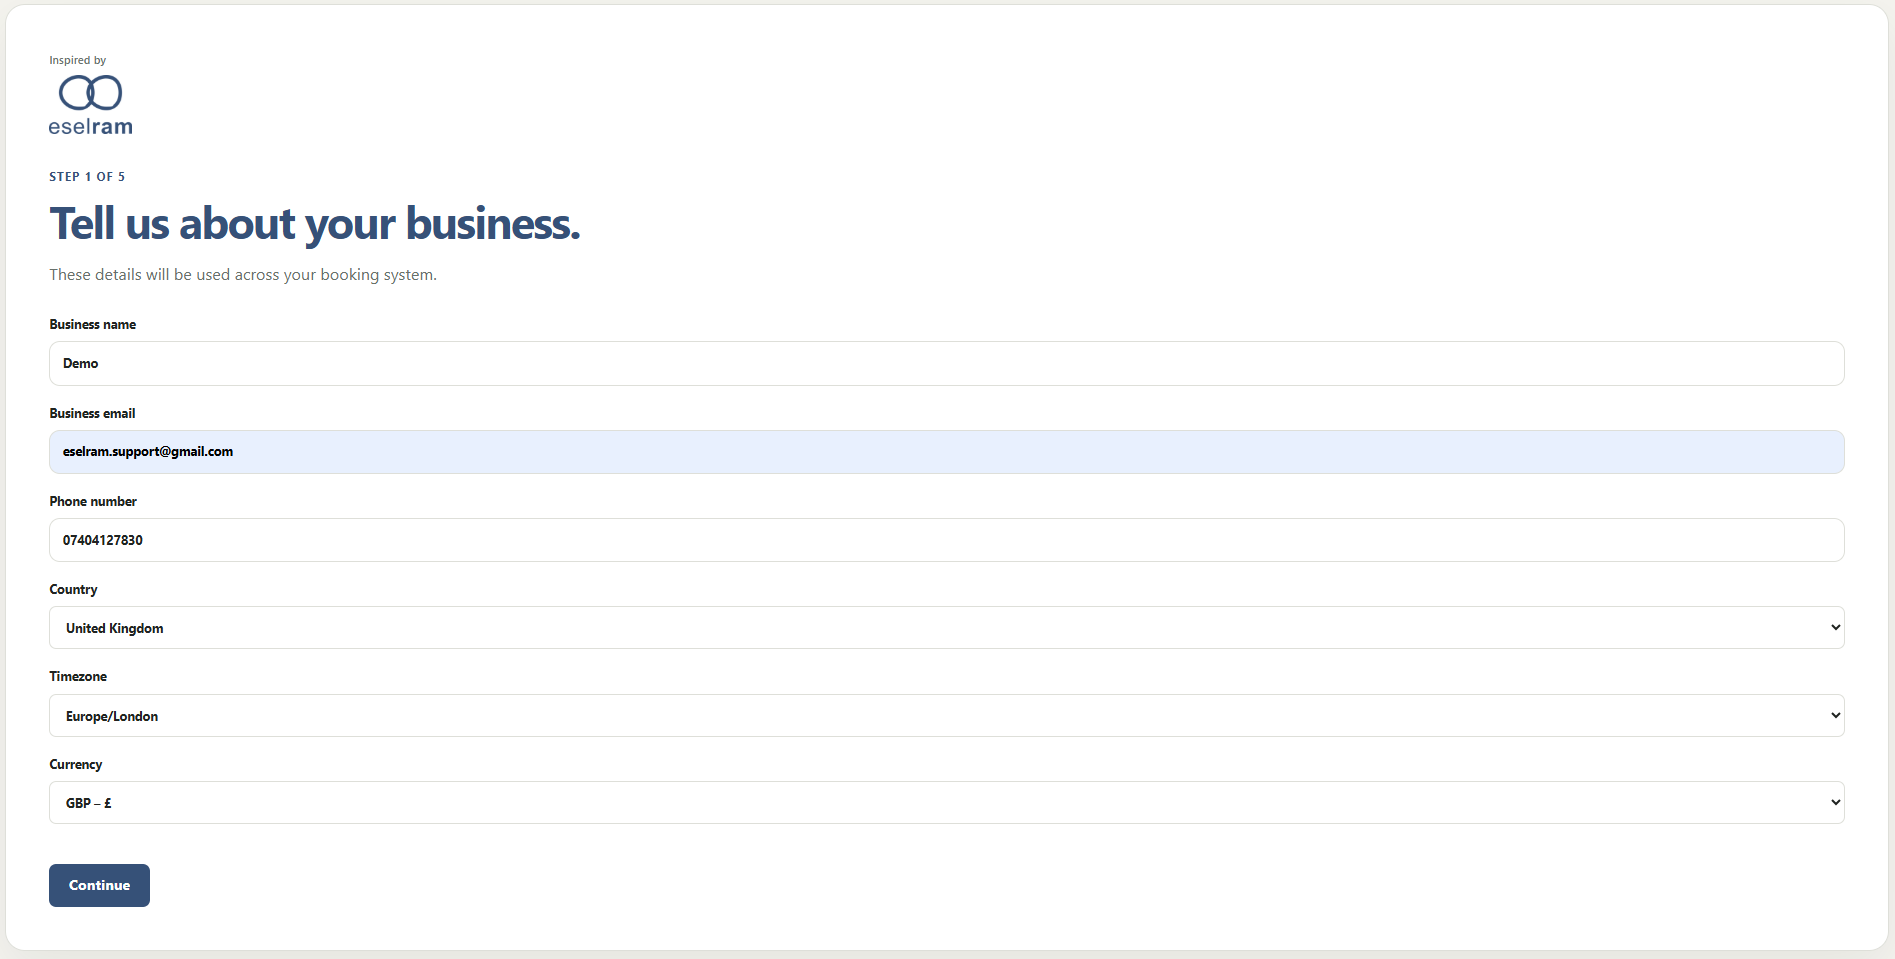
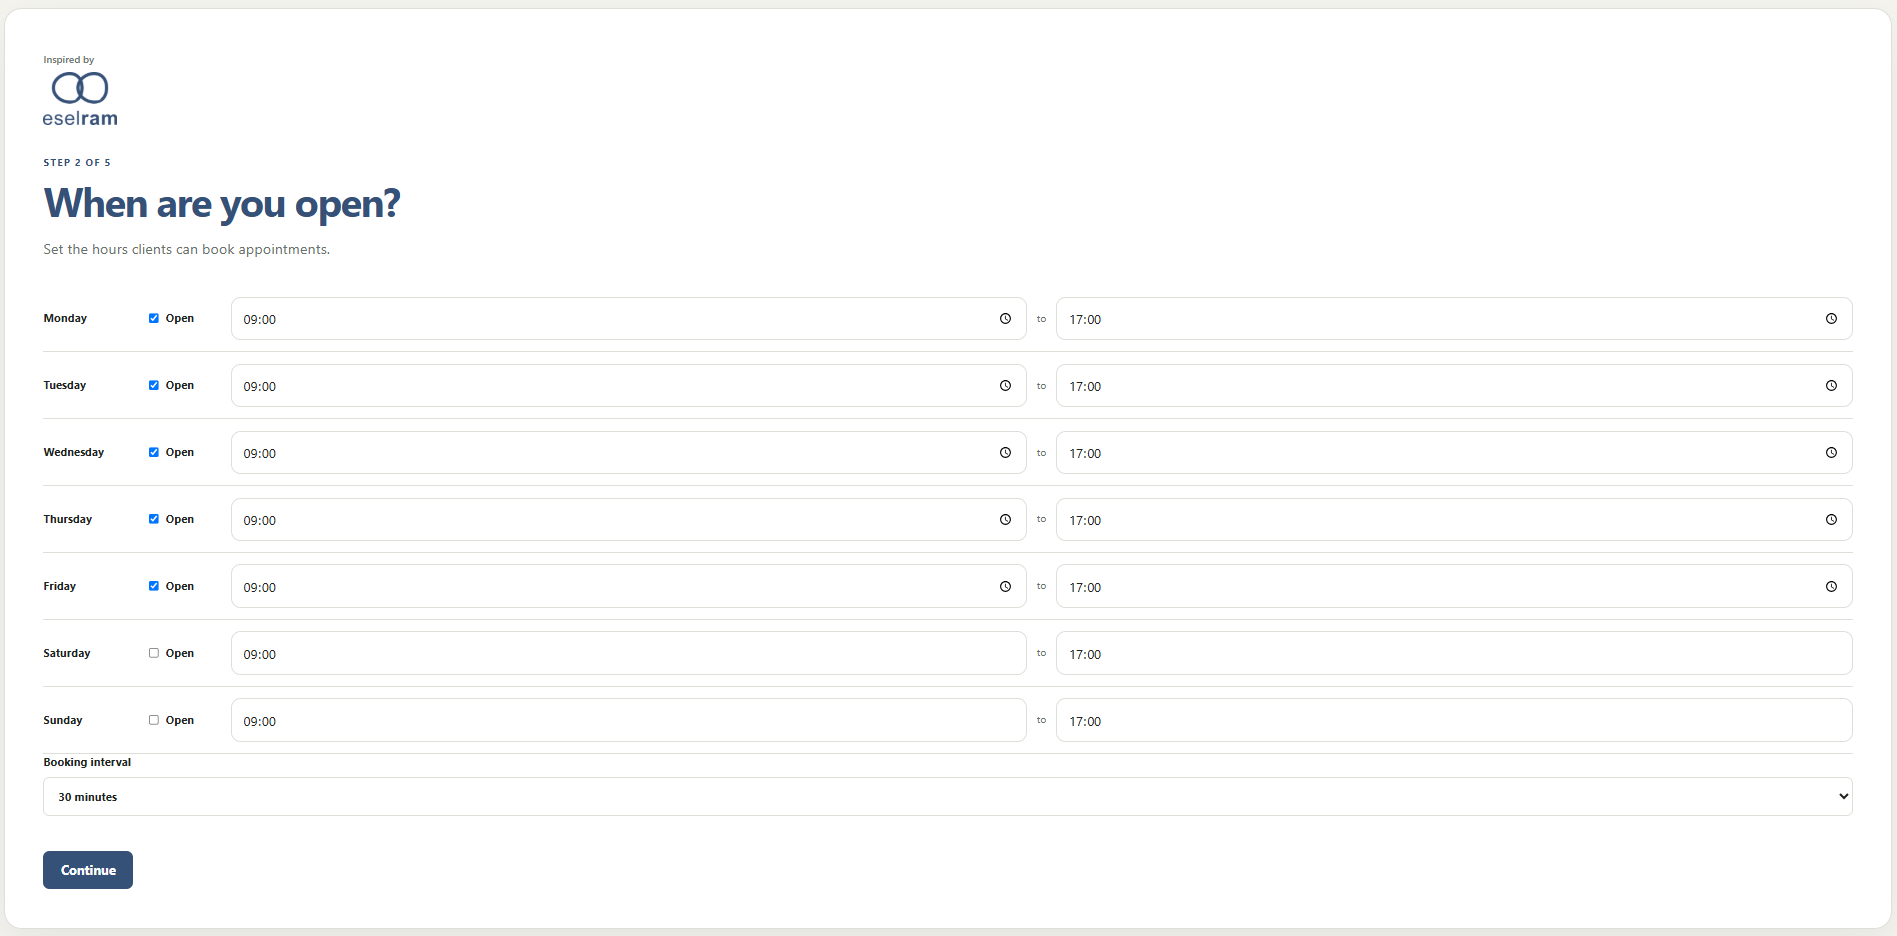
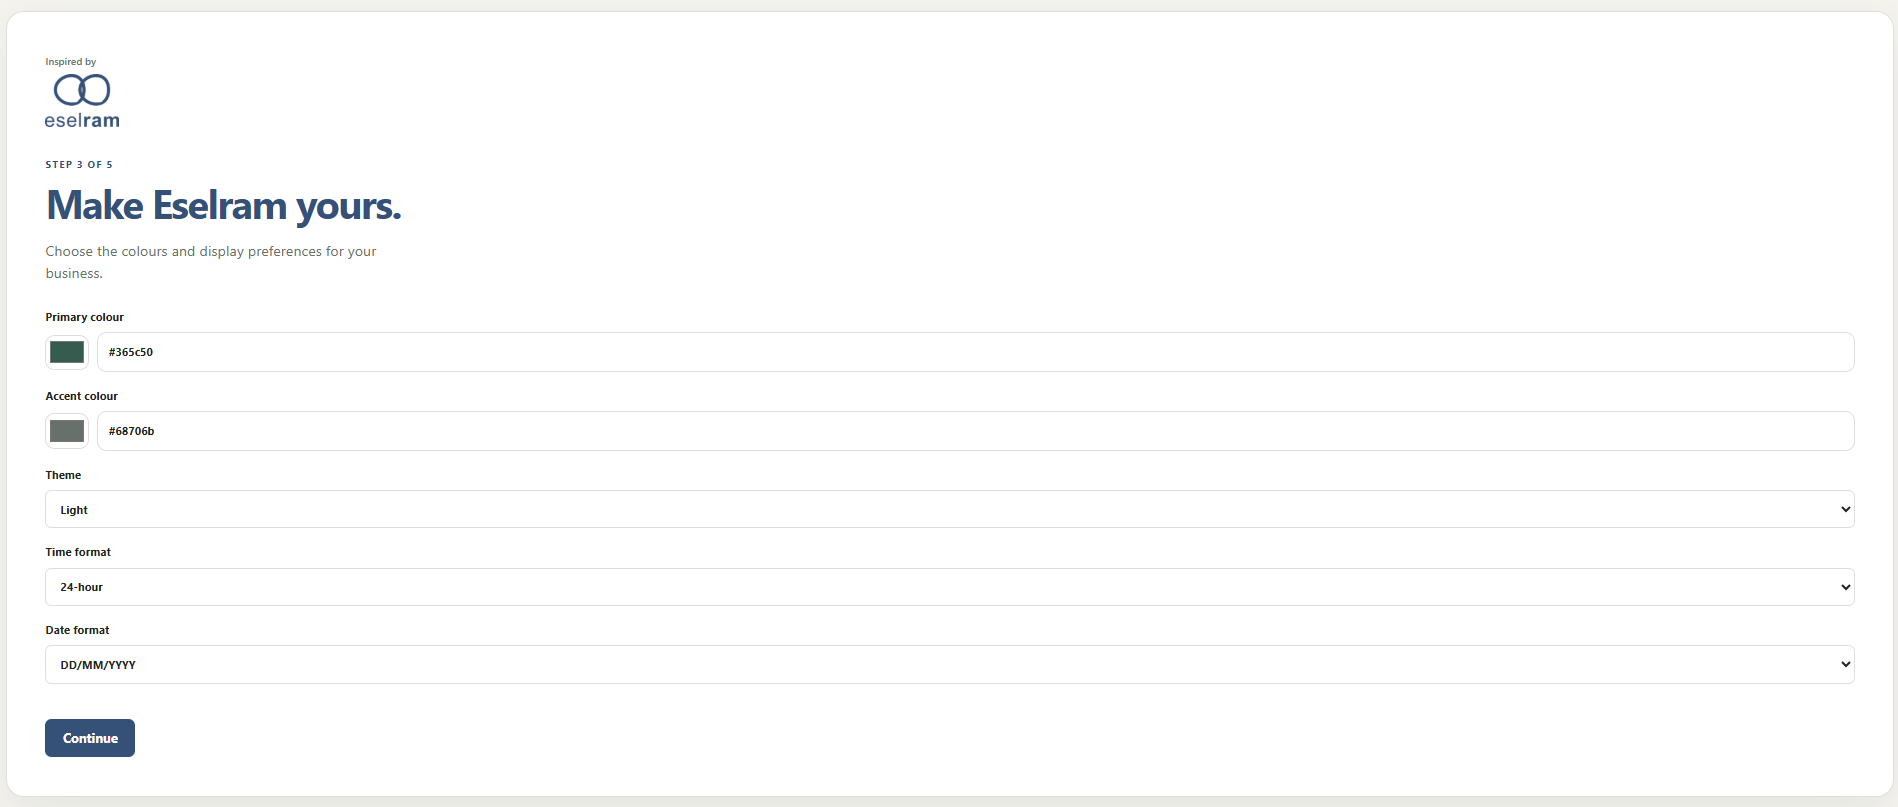
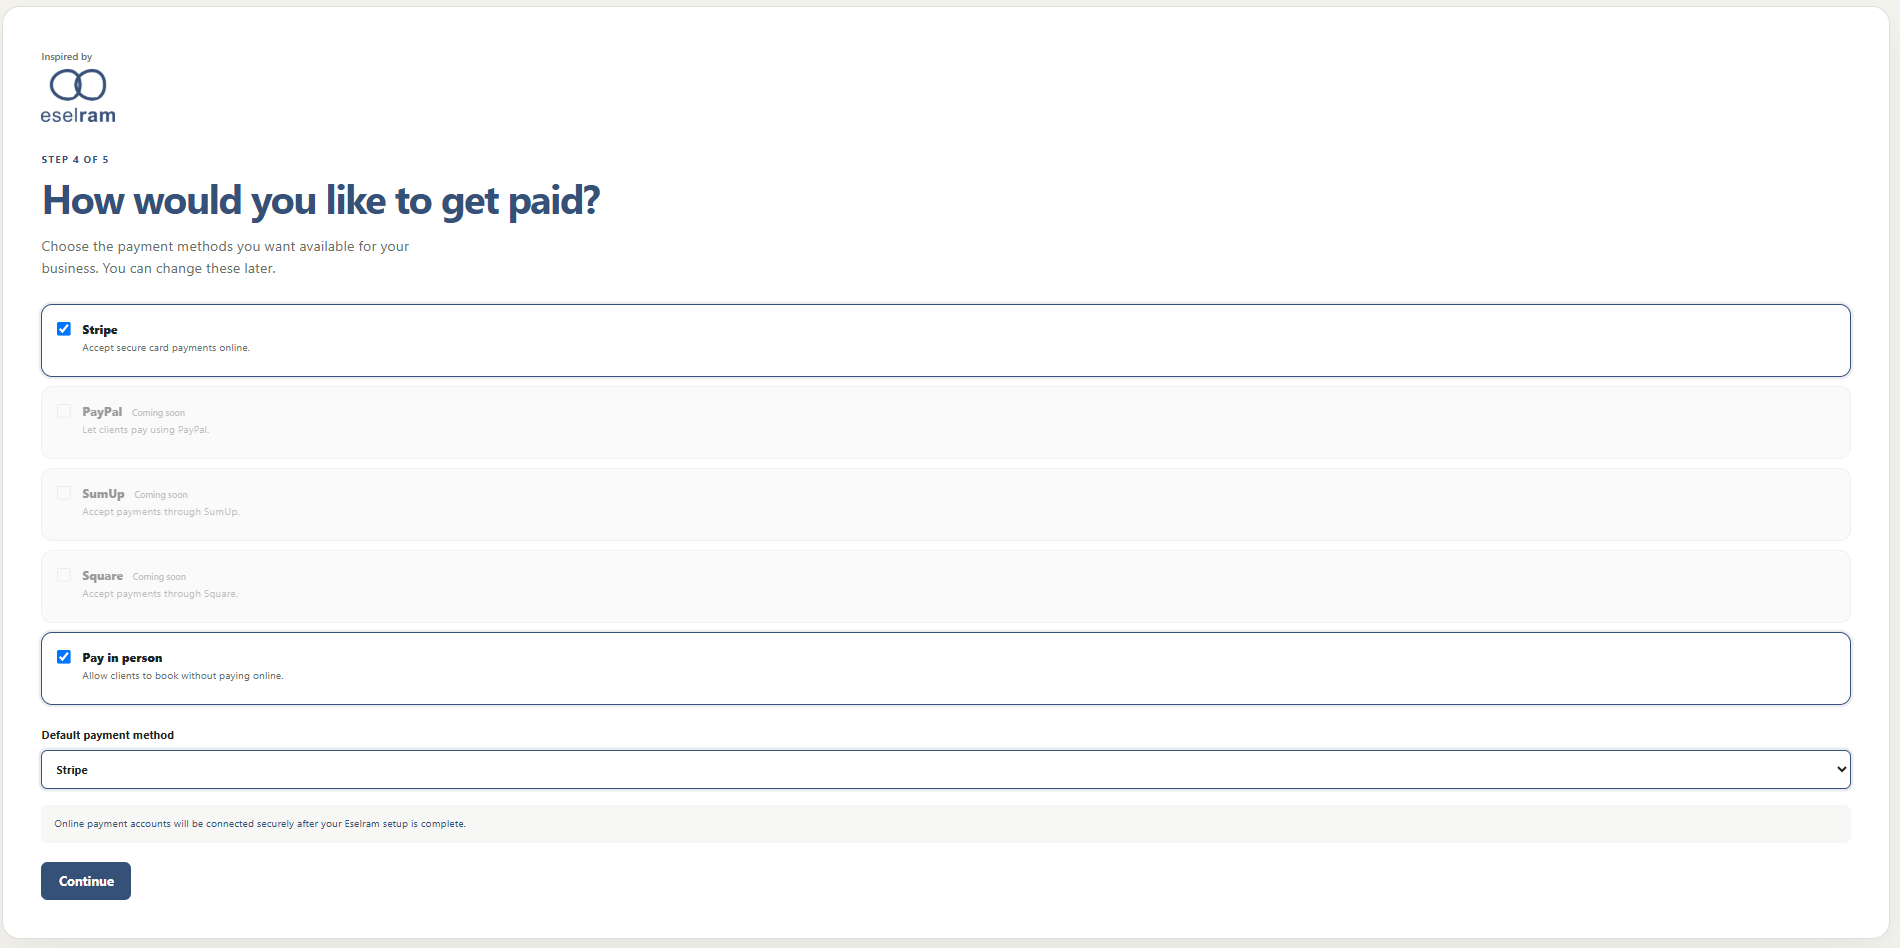
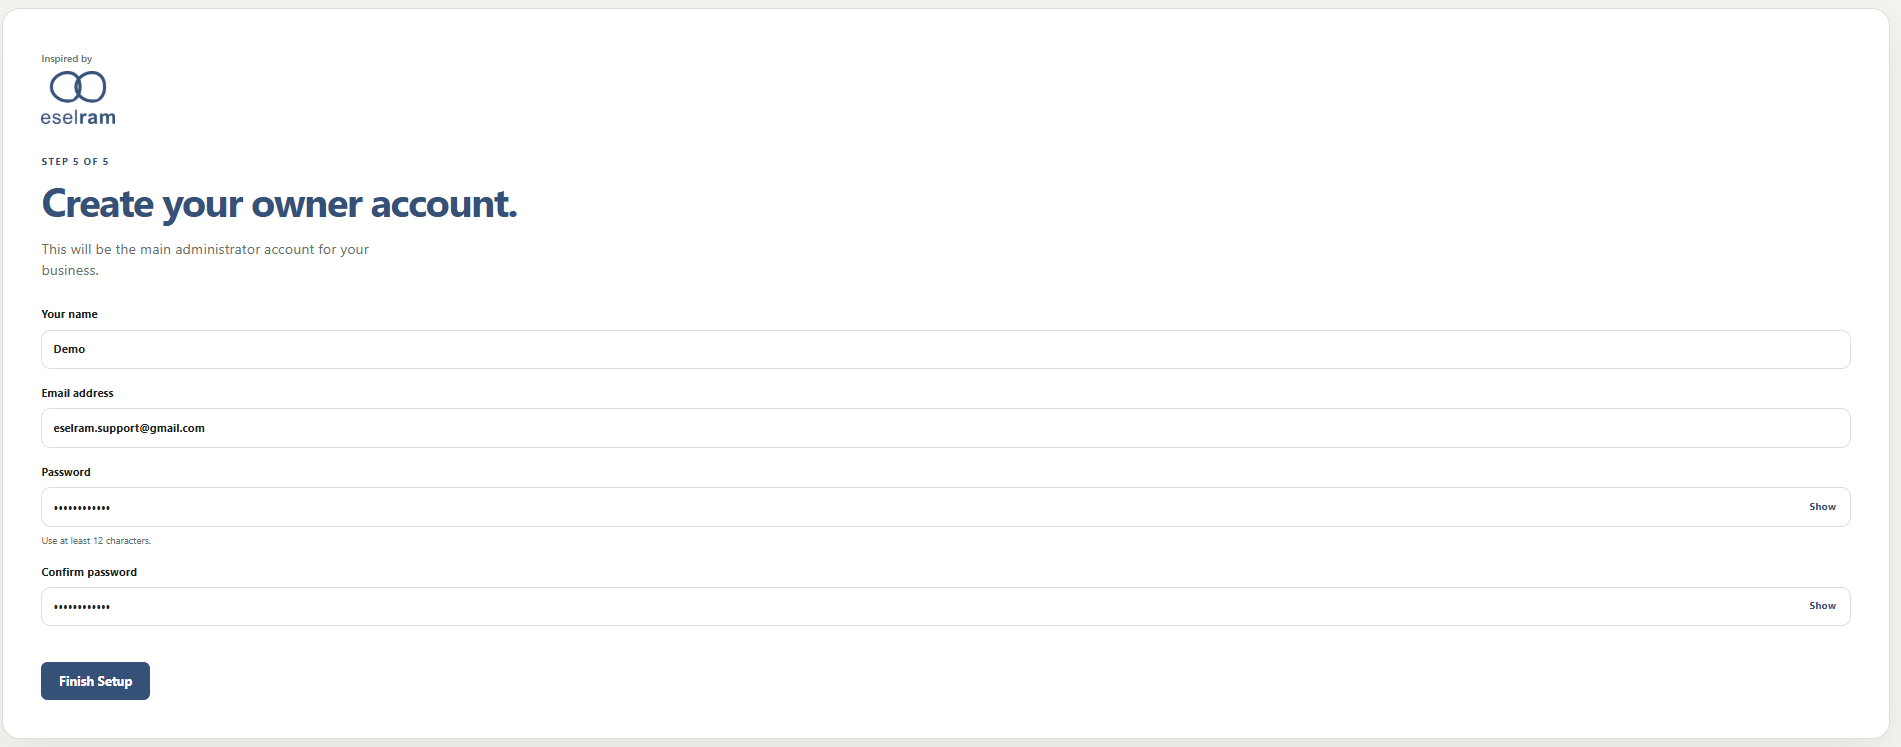
Your screens may vary slightly as Eselram is updated.
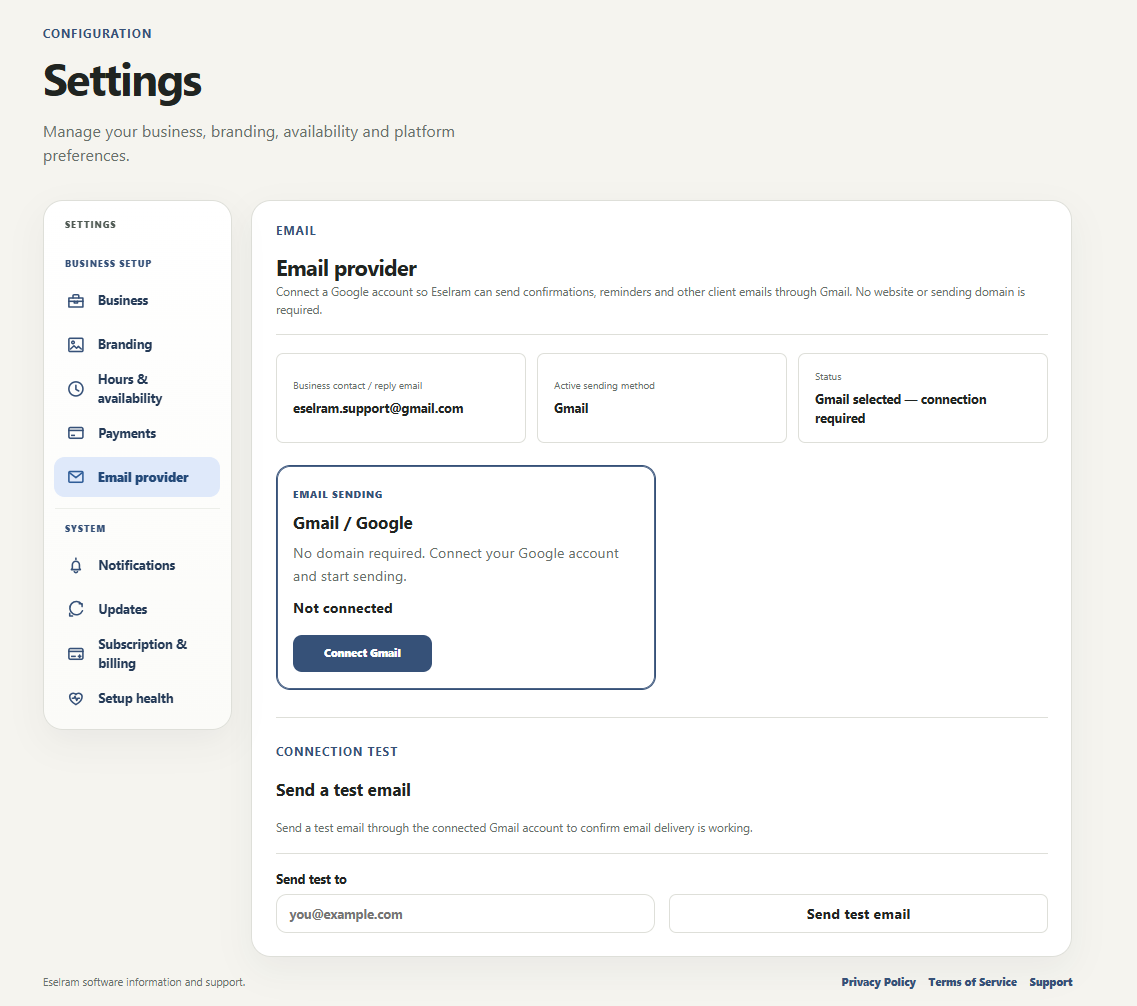
5. Check Gmail and customer communications
In Settings, confirm that the correct Gmail account is connected. This is the account Eselram uses for configured customer communications such as booking emails and other automated messages. Use the test-email option and make sure the message arrives successfully before accepting live bookings.
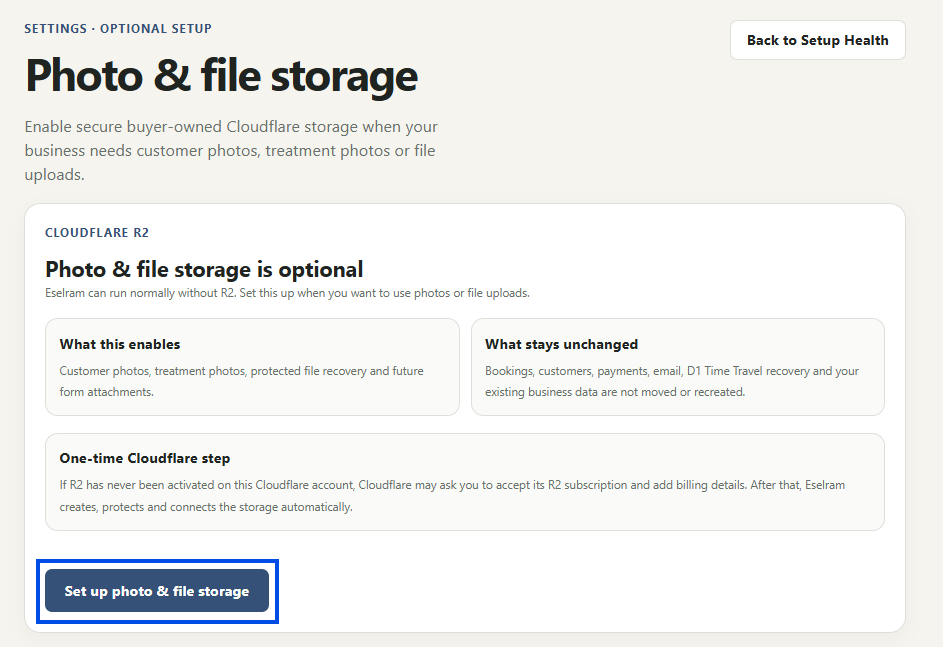
6. Configure photo and file storage if you need it
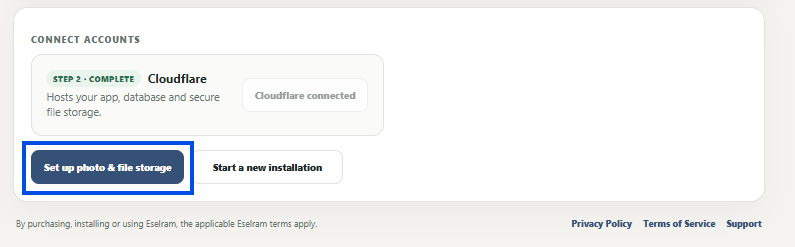
Photo and file storage is optional. Configure it if you want to keep customer photos or treatment files with the customer journey. Eselram guides you through creating or authorising the required Cloudflare storage and then returns you to Setup Health when it is ready.

7. Add your services and payment rules
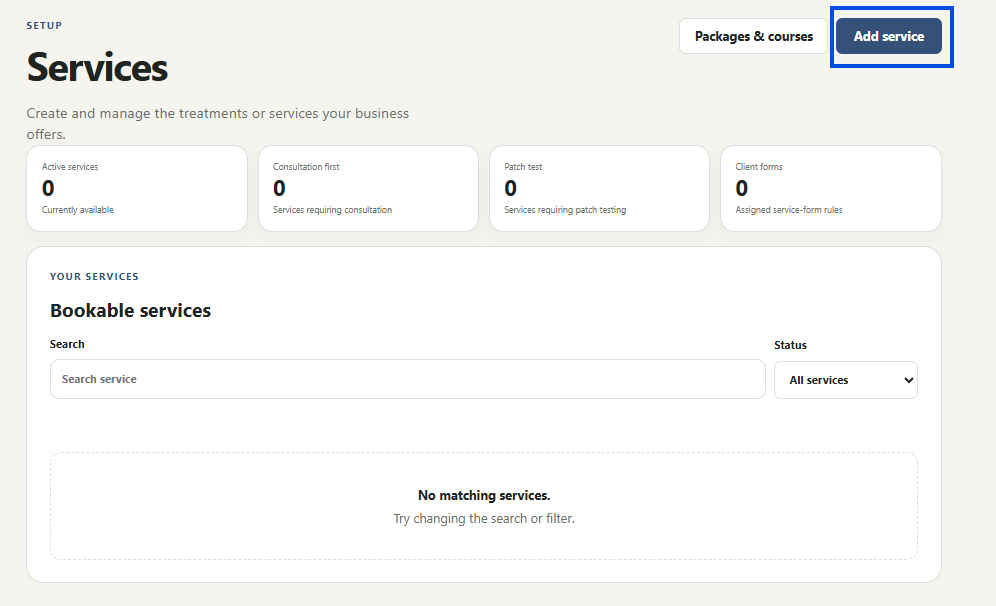
Go to Services and add each treatment or service your business offers. Configure the service name, duration, price and payment behaviour. For treatment workflows, also decide whether the service requires a consultation, patch test or customer form, and what should happen after consultation.
Use Pay online where you want Eselram to collect through Stripe, or choose the appropriate pay-at-appointment/manual rule where payment is taken another way.
8. Configure clinical templates and forms
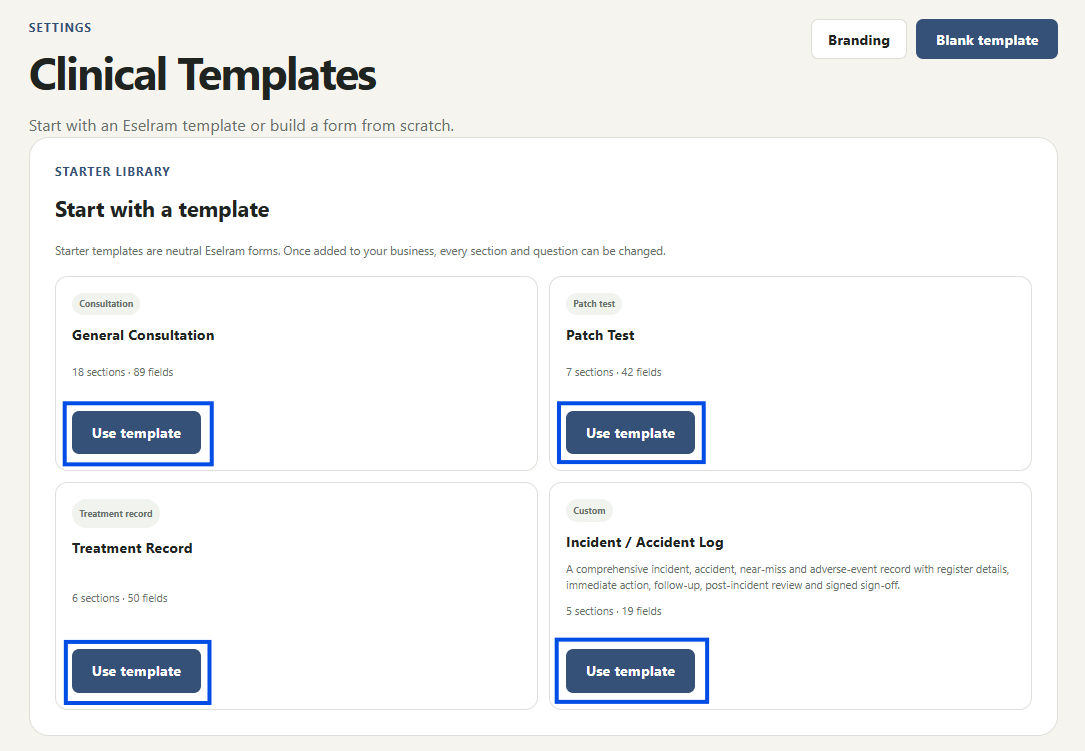
Open Clinical Templates to review Eselram's supplied templates or create your own. A template only becomes part of the customer journey after you configure it, publish it and associate it with the relevant service.
Build the form
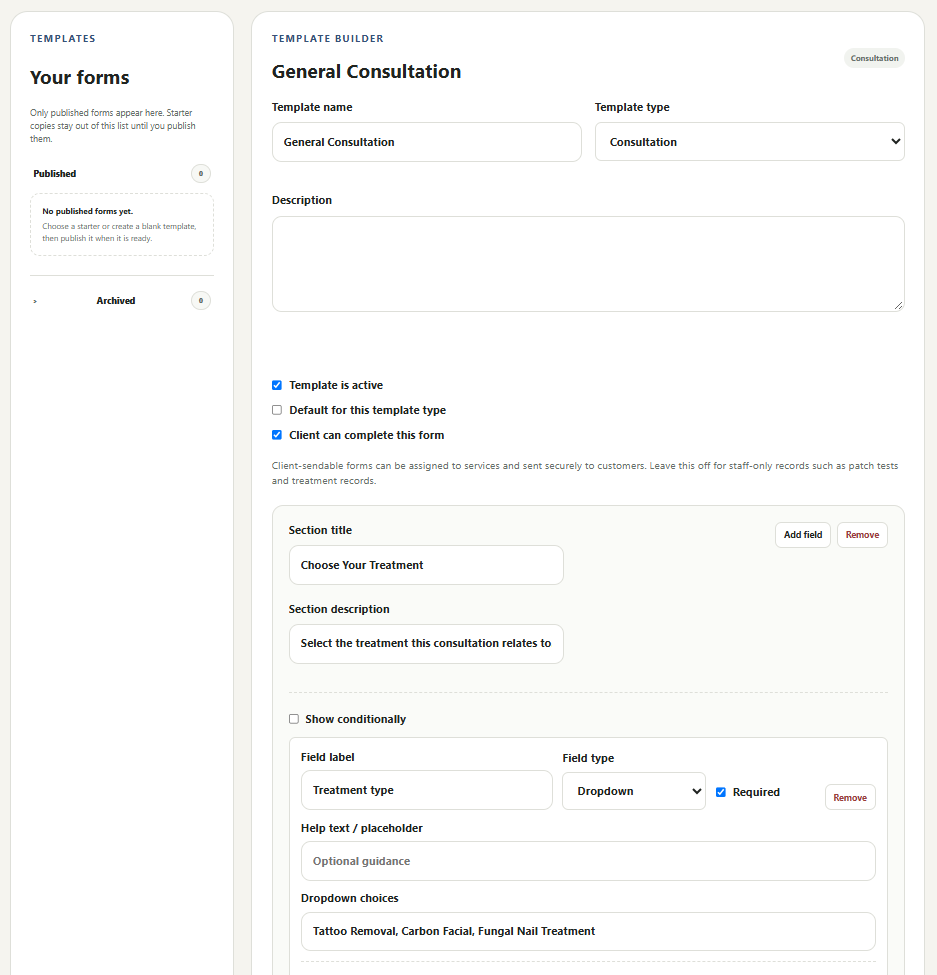
Add the fields you need, choose the correct field type and mark genuinely essential answers as required. Help text or placeholder text gives guidance - it is not saved as the customer's answer.
Conditional questions
Use Show conditionally where a question should appear only after a particular previous answer. This keeps forms shorter and avoids irrelevant questions.
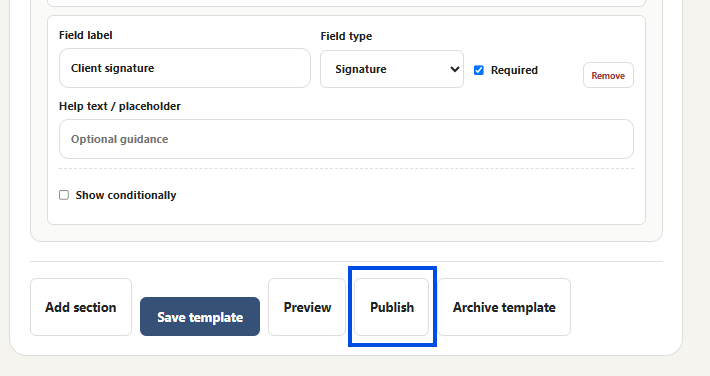
Publish
Preview the form, then publish the version you want to use. Return to the relevant service and select the customer form and when it should be sent.
9. Add your business branding
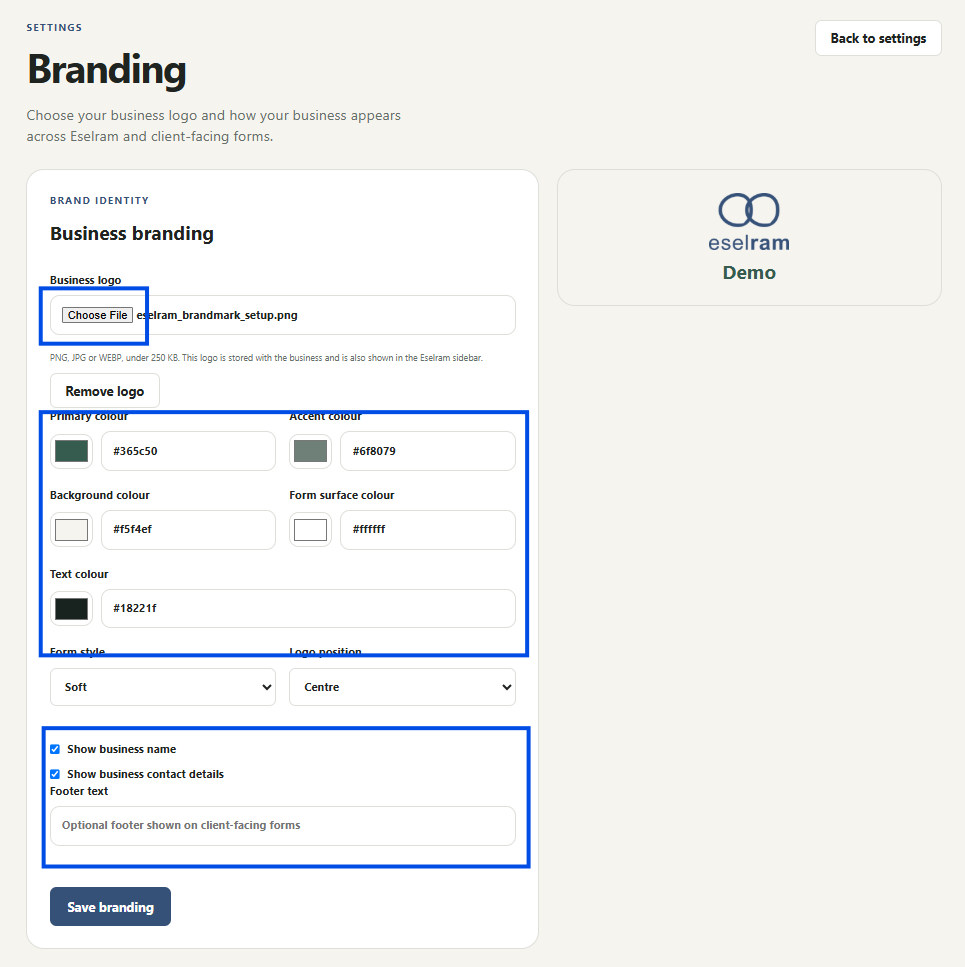
Open Settings → Branding and upload your business logo. Review the customer-facing branding options and preview the result. Use the business name and contact details you want customers to see.
10. Create packages and courses
If you sell several sessions together, create a package or course and set its service, number of sessions, price and any variants. Eselram can then keep completed, booked and remaining sessions connected to the customer rather than treating each appointment as an unrelated purchase.
Where appropriate, configure the particular package sessions after which a Google review request should be sent.
11. Configure Google reviews and aftercare
Add your business's direct Google review link and enable review requests only for the services or package sessions where you want them. Configure aftercare and other customer communications to match the treatments you provide. If no review link is saved, automatic review requests can be skipped.
12. Check Setup Health
Use Setup Health as your final configuration check. Resolve anything that still needs attention, but also verify the underlying setup yourself: send a test email, check your public availability, confirm your service prices and rules, and test Stripe if you accept online payments.
13. Make a complete test booking
Before sharing your booking link, act as one of your own customers and test the entire journey:
Public booking page → service → appointment → customer details → payment if required → confirmation email → consultation/form → customer profile → appointment → treatment/package record → completion → aftercare/review communication.
Then sign into the admin area and confirm the booking, payment, forms, customer information and package/treatment information have all reached the correct places.
You're ready.
Once your complete test journey works as expected, start sharing your Eselram booking link with customers. Set up your business once, then let Eselram keep the customer journey connected.
Service configuration
Service Setup Guide
Eselram Services control much more than what appears on your booking page. Each service defines how an appointment works from booking through consultation, payment, forms, treatment and follow-up.
1. Creating a service
Start by choosing the type of service you are creating.
Standard service / treatment
Use this for the actual service or treatment you provide, such as Tattoo Removal, Carbon Facial, Laser Hair Removal, Microneedling or Hair Extensions.
Consultation
Use this when you want a dedicated consultation appointment that can qualify a customer for another treatment. For example, create Tattoo Removal Consultation and link your Tattoo Removal treatment to it.
This keeps the consultation and treatment as separate appointments while allowing Eselram to connect both parts of the customer journey.
2. Service details and public booking category
Give the service a clear name and description. Set the duration to the calendar time that should be reserved whenever the service is booked, then enter the normal service price.
Public booking category
This groups related services together on the public booking page. For example, several treatments can use Tattoo Removal as their booking category. Leave it blank when the service should appear independently.
3. Choose how customers pay
The Payment rule determines what happens financially when the service is booked.
- Pay at appointment - books without taking the service payment online.
- Full payment online - requires the full configured price online.
- Deposit online - takes the configured deposit and leaves the remaining balance due.
- No payment required - allows booking without creating a payment requirement.
Online payment options require your online payment provider to be correctly connected and configured in Eselram.
4. Customer forms
Published customer forms can be connected to individual services. For example, a treatment can have a Treatment Consultation & Consent Form attached to it.
Choose when the form should be sent using the options available for that form, such as after booking confirmation, after payment or manually. The correct form then follows the service rather than relying on staff to remember which form belongs to each appointment.
Staff-only clinical records, including treatment or patch-test records, are managed separately and are not treated as customer forms.
5. Requires consultation
Turn on Requires consultation when a customer must complete a consultation before receiving the treatment. Eselram then allows you to select the consultation that qualifies the customer for that service.
Tattoo Removal
Requires consultation: Yes
Required consultation: Tattoo Removal Consultation
For new services, a dedicated Consultation service provides the clearest structure. Eselram also retains support for older configurations where consultation duration, fee and payment behaviour were configured directly against a treatment.
6. Consultation payment and credit
The consultation does not need to use the same payment arrangement as the treatment. For example, the consultation can cost £30 online while the treatment is configured as Pay at appointment.
Where your configured workflow allows it, an eligible paid consultation can provide a consultation credit towards the customer's first qualifying treatment or package.
Treatment price: £120
Eligible consultation credit: £30
Remaining treatment amount: £90
Eselram tracks the consultation used for the credit so the same qualifying credit is not simply applied repeatedly.
7. Requires patch test
Turn on Requires patch test when a patch test must be completed before treatment. Consultation and patch-test requirements are separate settings, so a service can require both, consultation only, or neither.
This allows each treatment to follow its actual clinical workflow instead of forcing every service through the same process.
8. After consultation - client can book treatment
Choose Client can book treatment when the consultation must happen first, but an established customer can subsequently book the treatment themselves.
This suits treatments where an initial assessment is required but the practitioner does not need to choose the exact treatment option every time. Eselram checks the customer when they use an existing-client treatment pathway rather than allowing an unidentified new customer to bypass the consultation requirement.
9. Practitioner manages treatment / package
Choose Practitioner manages treatment / package when you need to assess the customer before deciding exactly what treatment, size, course or package they should receive.
For example, a tattoo-removal customer may not know whether their tattoo should be classed as Tiny, Small, Medium, Large or XL. The practitioner can make that decision after assessment instead.
When configured this way, the customer cannot simply bypass the process and publicly book that practitioner-managed treatment as a normal unrestricted appointment.
10. Service is active and available for booking
Service is active controls whether a service is currently in use. If you stop offering a service, making it inactive lets you retain its historical records without continuing to offer it.
An active service is not automatically an unrestricted public booking. Eselram also considers its consultation and treatment-management configuration.
Consultation-first: Active + Requires consultation + Client can book treatment enforces the consultation while supporting the established-client journey.
Practitioner-managed: Active + Requires consultation + Practitioner manages treatment/package keeps the treatment active while the practitioner controls the treatment or package selection.
11. Packages, courses and variants
Packages allow several sessions to be sold and tracked together without charging each covered appointment again. Eselram can keep completed, booked and remaining sessions connected to the customer's treatment history.
Package variants
Variants are useful when one package has several versions, treatment sizes or prices. For example, Tattoo Removal - 6 Sessions could contain Tiny, Small, Medium, Large and XL variants.
Each variant can be connected to the appropriate service and have its own price and payment configuration. Variants are a package feature and are different from the Public booking category used to group services.
12. Packages with practitioner-managed treatments
Packages work particularly well with practitioner-managed treatments because the customer does not need to choose a clinical or treatment category before assessment.
The package therefore becomes part of the practitioner's treatment decision rather than automatically being exposed for public purchase.
13. Google review requests
A standard single treatment can be configured to Send Google review request after completion, provided your Google review link has been configured in Settings → Notifications.
Packages and courses can use session-based review configuration so you can choose which completed package sessions trigger a request. For example, you might request a review after session 2 and again after the final session of a six-session course.
14. Example - simple service
Service type: Standard service
Duration: 60 minutes
Price: £45
Payment: Pay at appointment
Requires consultation: No
Requires patch test: No
Service active: Yes
15. Example - consultation followed by customer booking
Requires consultation: Yes
Required consultation: Carbon Facial Consultation
After consultation: Client can book treatment
Use this where an initial assessment is required but you do not need to personally select every future treatment appointment.
16. Example - practitioner-managed treatment
Requires consultation: Yes
Requires patch test: Yes
Required consultation: Tattoo Removal Consultation
After consultation: Practitioner manages treatment / package
Package: Tattoo Removal - 6 Sessions
Variants: Tiny | Small | Medium | Large | XL
The customer is not responsible for deciding which treatment category is clinically or operationally appropriate.
Choosing the right setup
Can the customer choose and book the service themselves?
Use a normal standard-service booking flow.
Do they need an assessment first, but can book their own treatment afterwards?
Use Requires consultation → Client can book treatment.
Do you need to assess them and decide the exact treatment, size, course or package?
Use Requires consultation → Practitioner manages treatment / package.
This distinction allows Eselram to support both straightforward appointment-based businesses and controlled consultation-led treatment journeys without forcing every service through the same booking process.